

Have you ever stared at that gap between your foundation and the ground, wishing it looked a little less like an unfinished puzzle? We get it. Laying pavers near your foundation can be a bit like walking a tightrope – you want a smooth transition, not a tripping hazard. But fear not, we’ve got your back.
In this guide, we’ll break down the installation process step-by-step, so you can achieve a seamless look that’ll have your neighbors doing a double-take.
- Prepping like a pro: The groundwork for a flawless finish.
- Picking your pavers: The right choice for your project.
- Laying it down: Mastering the art of placement.
- The finishing touches: Locking it all in for lasting beauty.
Looking for a professional touch without the hefty price tag? Sublime Pavers, based in South Florida, is your answer. Our team of skilled artisans specializes in transforming ordinary spaces into extraordinary ones, with a focus on seamless paver installation near foundations. With years of experience and a commitment to excellence, we’re your go-to choice for creating a stunning and durable outdoor living area.
Prepp Like a Pro
Prepping the area next to your foundation is crucial for a seamless paver installation. Consider it as building a solid foundation for your masterpiece – skip this step, and you’re setting yourself up for cracks, unevenness, and a whole lot of frustration down the line.
Clear the Canvas
The first step? A clean slate. Remove any existing vegetation, rocks, or debris from the area. We want a smooth, level surface to work with. A shovel, rake, and a good ol’ pair of work gloves will be your best friends here.
If you’re dealing with stubborn weeds, consider using a non-selective herbicide a few days before starting your project. Just make sure to follow the instructions carefully and avoid any contact with desirable plants.
Digging Deep
Next, it’s time to excavate. You’ll need to dig a trench along the foundation, deep enough to accommodate your pavers, base material, and a proper slope for drainage. A good rule of thumb is to dig about 6-8 inches deep.
Use a level to check for any unevenness in the trench and make adjustments as needed. Remember, a level base is key to a smooth and stable paver installation.
Base Camp
Now, let’s talk about the base layer. This is what provides support and stability to your pavers, preventing them from shifting or sinking over time. A compacted layer of crushed stone or gravel is a popular choice.
Pour the base material into the trench, spreading it evenly and compacting it with a plate compactor. Aim for a compacted depth of about 4-6 inches.
- Pro Tip: Add a layer of geotextile fabric between the soil and the base material to prevent weeds from popping up and ruining your beautiful way to install pavers.
Leveling Up
On top of the base layer, add a layer of bedding sand. This will create a smooth, even surface for your pavers to rest on. Spread more sand evenly, about 1 inch thick, and screed it level using a straight board.
The Sublime Difference
At Sublime Pavers, we take the guesswork out of prepping your house foundation area. Our experienced team uses state-of-the-art equipment and techniques to ensure a perfectly level and stable base for your pavers. We also factor in proper drainage to prevent water pooling and potential damage to the installing pavers. With us, you can rest easy knowing your pavers will look stunning and last for years to come.
With your prep work completed, you’re ready to move on to the exciting part—choosing and laying your patio pavers.
Pick Your Pavers
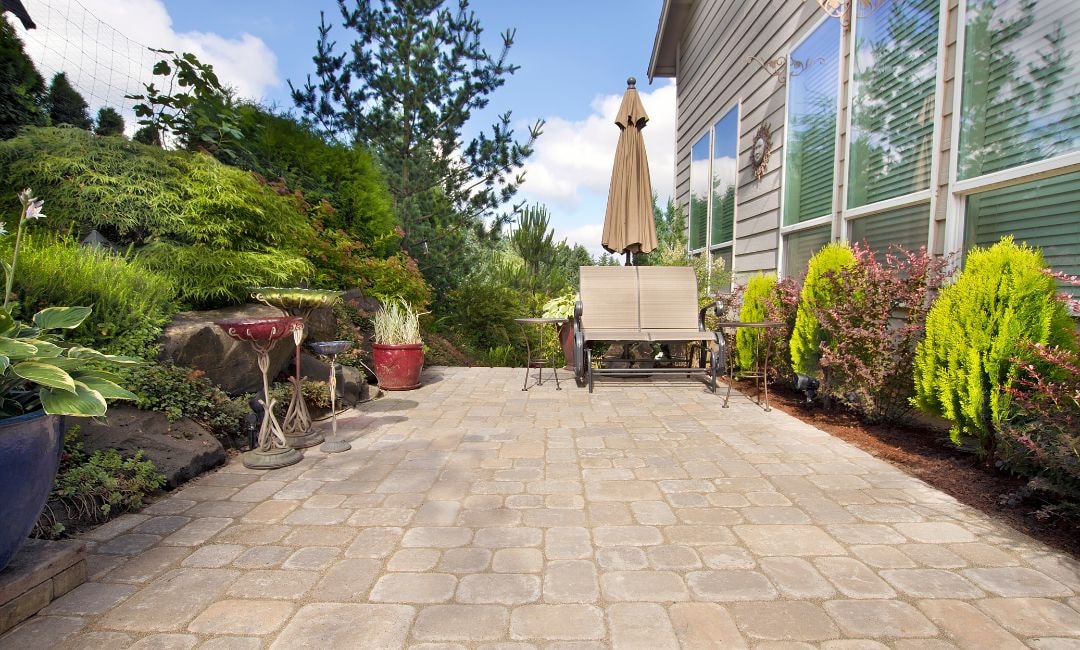
Now for the fun part – choosing the pavers that’ll bring your vision to life. With a dizzying array of colors, shapes, and textures available, it’s easy to get overwhelmed.
Style & Harmony
First things first, consider the overall style of your home and landscape. Are you going for a classic, rustic, or modern vibe? Your pavers should complement the existing aesthetic, creating a cohesive and harmonious look.
Function & Durability
Next, think about the function of the paved area. Is it a driveway, walkway, or paver patio? The type of paver you choose should be able to withstand the expected traffic and wear and tear.
For driveways, opt for thicker, interlocking pavers that can handle the weight of vehicles. For patios and walkways, thinner pavers might suffice.
Color & Texture
Now, let’s talk about color and texture. Lighter colors can make a small space feel larger and brighter, while darker colors add a touch of drama and elegance.
Textured pavers offer better traction, which is especially important in areas prone to moisture. Smooth pavers, on the other hand, are easier to clean and maintain.
The Sublime Pavers Edge
At Sublime Pavers, we offer a wide selection of premium pavers to suit any style and budget. Our experts can help you choose the perfect pavers for your project, taking into account your aesthetic preferences, functional needs, and budget. We also offer custom design options to create a truly unique and personalized outdoor space.
Order a few extra pavers to account for any cuts, breaks, or future repairs. It’s better to have a few leftovers than to scramble to find matching pavers later on.
With your pavers selected, you’re one step closer to achieving that seamless look. Now, let’s get those pavers laid.
Laying it Down for Perfect Placement
With your prep work done and pavers in hand, it’s time to start laying them down. This is where your vision starts to take shape, so let’s make sure every paver is placed with precision.
Starting Point
Begin laying your pavers at a 90-degree angle from the foundation. This will ensure a straight and even installation. Use a string line or a straight board as a guide to keep your rows aligned.
Spacing & Gaps
Maintain consistent spacing between pavers using spacers. This will allow for proper drainage and expansion/contraction due to temperature changes. Typically, a 1/4-inch gap is sufficient.
As you lay each paver, gently tap it into the bedding sand with a rubber mallet to ensure it’s level and secure. Use a level to check for any unevenness and make adjustments as needed.
Cutting & Fitting
Inevitably, you’ll encounter areas where full pavers won’t fit. This is where a wet saw or a paver splitter comes in handy. Carefully measure and mark the pavers before cutting to ensure a precise fit.
Pro Tip: Don’t be afraid to get creative with your paver layout. Consider using different colors, shapes, or patterns to add visual interest and personality to your design.
With your pavers laid, you’re well on your way to a seamless finish. Now, let’s lock it all in with the final touches.
The Finishing Touches

You’re almost there. With your pavers beautifully laid, it’s time to add the finishing touches that’ll secure everything in place and create that seamless look you’ve been dreaming of.
- Edge Restraint:
- Install edge restraints along the perimeter of your paved area to prevent the pavers from shifting or spreading over time. You can use plastic, metal, or concrete edging, depending on your preference and budget.
- Secure the edging to the ground using spikes or landscape adhesive. Make sure it’s level and flush with the pavers for a clean and professional appearance.
- Filling the Gaps:
- Sweep polymeric sand into the joints between the pavers. This will help lock them in place, prevent weed growth, and create a smooth, finished surface.
- Once the sand is in place, lightly mist it with water to activate the polymers. Avoid overwatering, as this can cause the sand to harden unevenly.
- Sealing the Deal: Consider applying a paver sealer to protect your investment from stains, fading, and weathering. A sealer can also enhance the color and texture of your pavers, giving them a richer, more vibrant appearance.
Pro Tip: Regularly sweep and clean your pavers to remove dirt, debris, and stains. This will help maintain their beauty and prolong their lifespan.
FAQs
Can I put pavers next to the foundation?
Absolutely. In fact, it’s a great way to create a seamless transition between your home and the surrounding landscape. Just make sure to follow the proper preparation and installation techniques to ensure a stable and long-lasting result.
Should I leave a gap between pavers and the house?
Yes, it’s recommended to leave a small gap, typically around 1/4 inch, between the pavers and the foundation. This allows for expansion and contraction due to temperature changes, preventing cracks and damage to your pavers or foundation.
How to lay pavers next to concrete?
Laying pavers next to concrete is similar to laying them next to a foundation. The key is to ensure proper drainage and prevent water from pooling against the concrete. You may need to adjust the slope of the base layer slightly to direct water away from the concrete.
What do you put between pavers and the house?
You should use a flexible sealant or backer rod to fill the gap between the pavers and the house. This will prevent water from seeping into the gap and causing damage, while still allowing for some movement.
Should pavers be sloped away from the house?
Yes, it’s crucial to slope your pavers away from the house to ensure proper drainage. A slight slope of about 1/4 inch per foot is usually sufficient to prevent water from pooling against the foundation and causing potential damage.
Level Up Your Curb Appeal: Wrapping Up
Creating a picture-perfect paver installation near your foundation requires more than just laying stones. You’ll need a well-thought-out patio plan to address potential issues like blocked airflow and rotting, ensuring proper drainage and ventilation.
Precision is key, so be prepared to cut pavers for a perfect fit. From start to finish, careful planning and execution are essential. Need some inspiration? Check out our image gallery for ideas and see how the right tools, materials, and a bit of effort can transform your outdoor space into the envy of the neighborhood, free from blocked airflow problems and rotting issues.
Key takeaways
- Prep work is paramount: A solid gravel base ensures a long-lasting, beautiful result.
- Choose pavers wisely: Style and function go hand-in-hand.
- Laying is an art: Precision and patience are your allies.
- Finishing touches matter: Seal the deal for a flawless look.
Ready to transform your outdoor space but feeling a bit overwhelmed? Sublime Pavers is here to turn your paving dreams into reality. Our team of experts will handle every aspect of your project, from design to installation, with meticulous attention to detail. We’ll ensure a seamless transition between your foundation and pavers, creating a stunning and functional outdoor living area that you’ll enjoy for years to come.


