

That crack in your driveway isn’t going to fix itself. In fact, it’s getting worse every time it rains or the temperature swings. Water seeps in, expands when it freezes, and turns a small crack into a costly problem. The good news? Most driveway cracks are a manageable DIY project that can save you hundreds in professional repair costs.
This guide walks you through exactly how to repair cracks in concrete driveway surfaces, from hairline fractures to deeper damage.
What you’ll learn:
- How to identify different crack types and what they mean
- Materials and tools you’ll need for a lasting repair
- Step-by-step repair process for small and large cracks
- When DIY works and when to call a professional
- How to prevent future cracks from forming
At Sublime Pavers, we handle concrete and paver repairs across Broward County. If your driveway damage goes beyond a weekend fix, we’re happy to take a look and give you an honest assessment.
How to Identify Different Crack Types and What They Mean
Not all concrete cracks are the same. Some are purely cosmetic. Others signal serious structural problems that require professional attention. Before you grab your caulk gun and start filling, take a moment to assess what you’re dealing with.
Hairline Cracks (Surface-Level)
These fine cracks appear as thin lines no wider than 1/8 inch. They typically stay at the surface and don’t extend through the entire driveway slab.
- What they mean: Hairline cracks usually result from the concrete drying too quickly during installation or minor surface shrinkage. They’re cosmetic concerns, not structural emergencies.
- Can you DIY? Yes. These are the easiest to fix with a simple elastomeric crack filler or concrete resurfacer.
Minor Cracks (Up to 1/4 Inch Wide)
These cracks are wider than hairlines but still relatively shallow. You can typically see dirt and debris accumulating in the gap.
- What they mean: Minor cracking often develops from normal wear, temperature fluctuations, or light settling. If caught early, they won’t compromise your driveway’s integrity.
- Can you DIY? Yes. A flexible polyurethane sealant handles these well. The key is addressing them before water infiltration causes further cracking.
Major Cracks (Over 1/4 Inch Wide)
When cracks exceed 1/4 inch, you’re looking at more significant damage. These often extend deeper into the slab and may have jagged edges where chunks have broken away.
- What they mean: Major cracks typically indicate underlying issues like poor subgrade compaction, tree root pressure, or excessive vehicle traffic loads. The existing concrete has shifted or settled unevenly.
- Can you DIY? Maybe. You can fill these with backer rod and flexible caulk, but the repair may be temporary if the underlying cause isn’t addressed.
Structural Cracks (Wide, Deep, or Uneven)
These are the serious ones. Cracks wider than 1/2 inch, cracks where one side sits higher than the other, or cracks accompanied by slab sections that rock when you step on them.
- What they mean: Your driveway has structural failure. The base underneath has eroded, compacted unevenly, or was never properly installed. Filling these cracks won’t solve the problem.
- Can you DIY? No. Call a professional. These situations often require slab jacking, complete removal, or replacement.
Crazing (Spider Web Pattern)
Crazing looks like a network of interconnected fine cracks covering a large area, resembling a spider web or shattered glass pattern.
- What they mean: The surface layer dried too fast during curing, typically from hot weather, wind, or improper finishing. The damage is cosmetic and limited to the top layer.
- Can you DIY? Yes. Concrete resurfacing products can restore the appearance if the underlying slab remains sound.
Quick Reference Table
| Crack Type | Width | Depth | DIY Repair? | Urgency |
|---|---|---|---|---|
| Hairline | Under 1/8″ | Surface only | Yes | Low |
| Minor | 1/8″ to 1/4″ | Shallow | Yes | Medium |
| Major | 1/4″ to 1/2″ | Moderate to deep | Maybe | High |
| Structural | Over 1/2″ | Through slab | No | Immediate |
| Crazing | Fine network | Surface only | Yes | Low |
Take pictures of your cracks before starting any repair. This helps you track whether they’re growing over time and provides documentation if you need to call contractors later.
Materials and Tools You’ll Need for a Lasting Repair
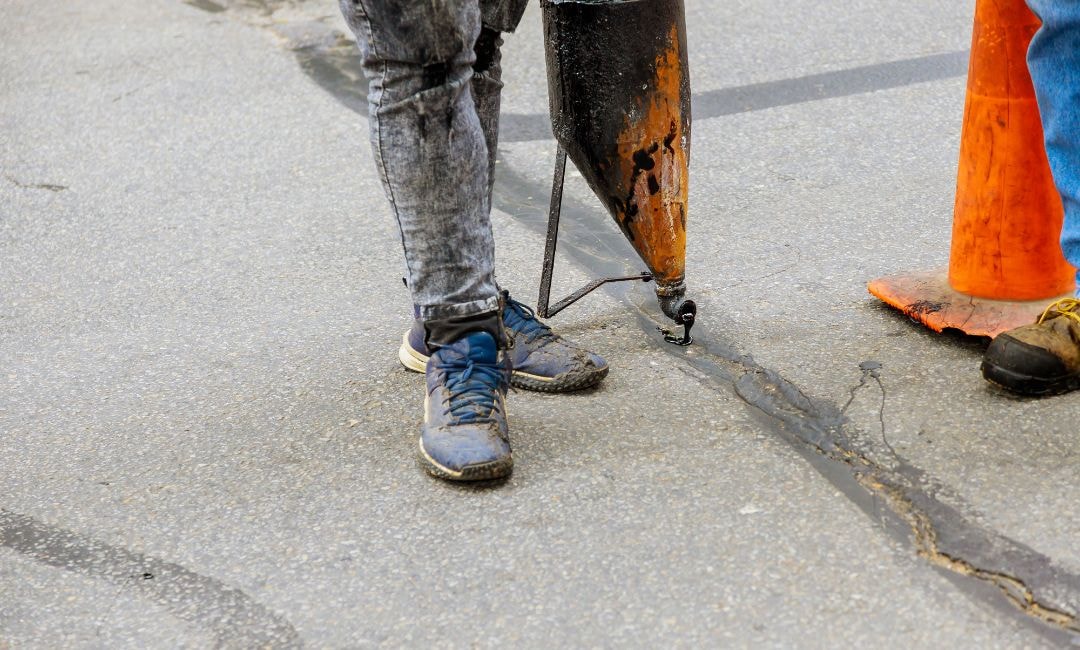
The right materials make the difference between a repair that lasts years and one that fails after the first rain. Here’s your complete shopping list based on the type of crack you’re addressing.
Essential Materials
For hairline and minor cracks (under 1/4 inch):
- Flexible polyurethane crack filler: Look for products specifically designed for concrete. Avoid rigid fillers that crack again when the slab expands and contracts.
- Self leveling caulk: Best for horizontal surfaces like driveways. It flows into voids and creates a smooth, flat finish without tooling.
- Non-sag caulk: Use this for vertical edges or to dam the ends of cracks before applying self-leveling products.
For wider cracks (1/4 inch to 1/2 inch):
- Foam backer rod: This foam rope fills deep voids so you don’t waste expensive filler. Choose a diameter slightly larger than your crack width for a snug fit.
- Sand: An alternative to backer rod for very deep cracks. Fill most of the void with sand before applying filler on top.
- Two part epoxy: For cracks that need structural strength, especially in high-traffic areas. More difficult to apply but creates a stronger bond.
For surface-level crazing or spalling:
- Concrete resurfacer: A polymer-modified overlay that covers the entire surface with a fresh layer. Not for structural repairs, but excellent for cosmetic restoration.
- Concrete bonding agent: Improves adhesion between old and new materials.
Essential Tools
Your tool list depends on the scope of the repair:
- Caulk gun: Standard size works for most residential repairs. Make sure it fits your filler tubes.
- Pressure washer: Essential for proper surface prep. Dirt and debris prevent the filler from creating a proper bond.
- Leaf blower or shop vacuum: Removes loose material and dries cracks after washing.
- Wire brush: Scrubs out stubborn debris from crack edges.
- Chisel and hammer: Widens narrow cracks and removes loose concrete. Sometimes you need to make a crack bigger before you can fill it properly.
- Putty knife or trowel: Smooths filler and removes excess.
- Safety gear: Gloves, safety glasses, and knee pads for comfort.
Material Cost Breakdown
| Item | Approximate Cost | Coverage |
|---|---|---|
| Polyurethane crack filler | $8-$15 per tube | 10-20 linear feet |
| Self leveling caulk | $10-$18 per tube | 8-15 linear feet |
| Foam backer rod (20 ft) | $3-$8 | 20 linear feet |
| Two part epoxy kit | $25-$50 | 5-10 linear feet |
| Concrete resurfacer (20 lb) | $20-$35 | 15-20 sq ft |
Pro tip:Buy more filler than you think you need. Cracks often run deeper than they appear, and you may need to top off after the first application settles.
Step-by-Step Repair Process for Small and Large Cracks
Now for the actual fix. The process varies slightly based on crack size, but the fundamentals remain the same: clean thoroughly, prep properly, fill completely, and allow adequate cure time.
Repairing Small Cracks (Under 1/4 Inch)
Step 1: Clean the crack thoroughly
Start by removing all loose material. Use a wire brush to scrub the crack edges, then blow out debris with a leaf blower or shop vacuum. For stubborn dirt, use your pressure washer on a low setting.
Let the crack dry completely. Moisture trapped inside prevents proper adhesion. In humid climates, wait 24 to 48 hours after washing.
Step 2: Widen if necessary
Hairline cracks sometimes need to be slightly widened to accept filler. Use a chisel to create an inverted “V” shape, making the crack wider at the bottom than the top. This helps the filler lock in place rather than popping out later.
Step 3: Apply the filler
Cut your caulk tube nozzle at a 45-degree angle, slightly smaller than the crack width. Load it into your caulk gun.
Hold the nozzle just below the surface and apply steady pressure as you move along the crack. Fill the entire length in one continuous bead. The goal is to fill the void completely without mounding above the surface.
Step 4: Smooth and texture
For self leveling caulk, simply let it settle. It will find its own level within minutes.
For non-sag products, use a putty knife dipped in soapy water to tool the surface smooth. Match the surrounding concrete texture as closely as possible.
Step 5: Add sand for camouflage
While the filler is still tacky, sprinkle fine sand over the surface. This helps the repair blend with the surrounding concrete and prevents debris from sticking during cure time.
Step 6: Allow proper cure time
Keep foot traffic off for at least 24 hours. Vehicle traffic should wait 48 to 72 hours, or follow the manufacturer’s instructions. Rushing this step can ruin your entire repair.
Repairing Large Cracks (1/4 Inch to 1/2 Inch)
Step 1: Deep clean and prep
Large driveway cracks accumulate more debris. Dig out packed dirt, remove weeds, and clear any old filler material. A shop vacuum works well for removing fine particles from deep voids.
Wash with your pressure washer and allow complete drying.
Step 2: Insert backer rod
Choose foam backer rod slightly larger in diameter than your crack width. Push it into the crack about 1/2 inch below the surface using a screwdriver or putty knife.
The backer rod serves two purposes: it reduces the amount of filler needed and creates a proper shape for the caulk to bond effectively.
For very deep cracks, you can add sand to fill the lower portion before inserting backer rod at the top.
Step 3: Apply filler in layers
Large cracks may require multiple applications. Fill the crack about halfway, let it set for the recommended time, then apply a second layer to complete the repair.
Overfilling causes problems. The filler should sit slightly below the concrete surface to protect it from vehicle traffic wear.
Step 4: Smooth and cure
Use a wet putty knife to create a smooth finish that’s tooled smooth and level with the surrounding slab. Add sand for texture if desired.
Cure times for deep repairs run longer. Plan for 72 hours minimum before allowing vehicle traffic.
Dealing with Control Joints
Control joints are the intentional grooves cut into concrete to control where cracking occurs. When these joints deteriorate or fill with debris, they need attention too.
Clean the joint thoroughly, insert backer rod if it’s deep, and fill with self leveling caulk designed for joint applications. Maintain the joint’s original shape rather than filling it flush with the surface.
When DIY Works and When to Call a Professional
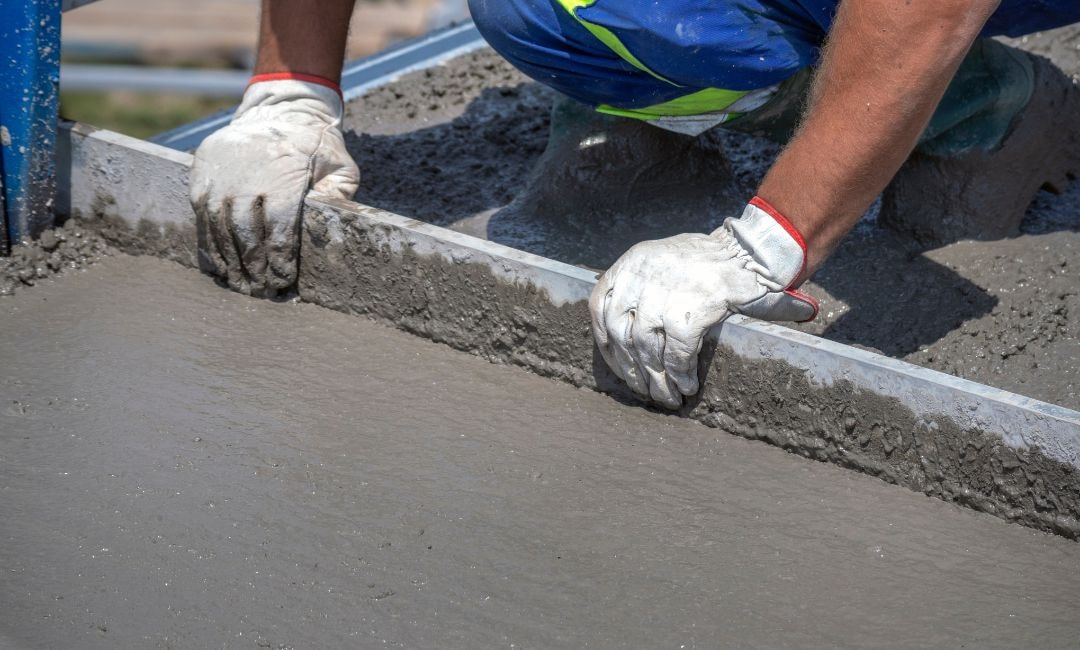
Personal experience and online guides can only take you so far. Some repairs genuinely fall within DIY territory. Others require professional equipment, expertise, or structural assessment that no YouTube video can replace.
DIY Is Your Best Bet When:
The cracks are surface-level and stable
Hairline cracks, minor crazing, and small gaps that haven’t changed in months are perfect DIY candidates. You’re essentially doing preventive maintenance to keep water out and protect the slab from further damage.
The crack is isolated
One or two cracks in an otherwise solid driveway? That’s a weekend project. Clean, fill, seal, done.
The slab is level
If both sides of the crack sit at the same height and the concrete doesn’t rock or shift when you walk on it, the underlying base is likely intact. Surface repairs should hold.
You’re comfortable with the tools
If you’ve used a caulk gun before and don’t mind spending a few hours on hands-and-knees work, you can handle most minor to moderate repairs.
Budget is tight
DIY crack repair costs $20 to $50 in materials for most driveways. Professional repairs start at $100 to $150 just for the service call, plus $1 to $3 per linear foot for the actual work.
Call a Professional When:
Cracks are wider than 1/2 inch
These indicate structural movement that filling alone won’t fix. A professional can assess whether slab jacking, mudjacking, or replacement is needed.
One side sits higher than the other
Uneven cracks signal settling underneath the slab. The base has eroded or compacted unevenly. Filling the surface crack without addressing the void underneath is pointless.
Cracks keep returning
If you’ve filled the same crack multiple times and it keeps reopening, the slab is still moving. Something underneath needs attention.
Multiple large cracks or a pattern of damage
Widespread cracking across your entire driveway suggests systemic problems: poor original installation, inadequate base preparation, or drainage issues routing water beneath the slab.
The concrete is crumbling or spalling
When chunks break away or the surface deteriorates beyond simple cracking, resurfacing or replacement may be the only viable solution.
Tree roots are involved
Root pressure will continue to lift and crack concrete until the root is removed or redirected. This often requires excavation work beyond typical DIY scope.
Cost Comparison
| Repair Type | DIY Cost | Professional Cost |
|---|---|---|
| Hairline/minor cracks | $20-$50 | $150-$300 |
| Major cracks (filling) | $40-$80 | $200-$500 |
| Slab leveling | Not recommended | $500-$1,500 |
| Partial resurfacing | $50-$150 | $300-$800 |
| Full replacement | Not applicable | $3,000-$8,000+ |
When in doubt, get an estimate. Most concrete contractors offer free assessments. You’ll learn whether DIY is realistic and have a baseline for professional pricing if you decide to hire out.
How to Prevent Future Cracks from Forming
Fixing existing concrete cracks is only half the battle. Without addressing the causes, you’ll be doing this same repair again in a year or two. Here’s how to protect your investment and extend your driveway’s life.
Seal Your Driveway Regularly
A quality concrete sealer creates a barrier against water infiltration, the primary cause of freeze-thaw damage. Seal your driveway every 2 to 5 years, depending on climate and wear.
Apply sealer after completing crack repairs and allowing full cure time. The sealer covers your repairs and prevents water from finding new entry points.
Maintain Proper Drainage
Water pooling on or near your driveway erodes the base underneath and accelerates cracking. Check that:
- Your driveway slopes away from your house and garage
- Gutters direct water away from the driveway edges
- No low spots collect standing water after rain
If you notice pooling, consider adding a channel drain or regrading the surrounding landscape.
Address Small Cracks Immediately
Don’t wait until hairline cracks become major problems. Water enters even the smallest gaps, and once it gets underneath your slab, the damage accelerates.
Keep crack filler on hand and address new cracks as soon as you spot them. A $10 tube of caulk today prevents a $500 repair tomorrow.
Control What Drives on Your Driveway
Standard residential concrete handles cars and light trucks without issue. But heavy vehicles like delivery trucks, RVs, or construction equipment can stress the slab beyond its design capacity.
If you regularly park heavy vehicles, consider reinforcing high-traffic areas or designating parking zones that can handle the load.
Protect Against Chemical Damage
Deicing salts, fertilizers, and automotive fluids break down concrete over time. In winter:
- Use sand or kitty litter for traction instead of salt when possible
- Clean up oil leaks and spills promptly
- Rinse your driveway after applying lawn chemicals nearby
Watch for Warning Signs
Regular inspection catches problems early. Walk your driveway seasonally and look for:
- New cracks or existing cracks that have widened
- Areas that sound hollow when tapped
- Sections that have settled or heaved
- Vegetation growing through joints or cracks
Early intervention is always cheaper than emergency repairs.
Consider Expansion Joints
If your driveway lacks adequate control joints, adding them can direct cracking to predictable locations. This is more relevant for new installations, but contractors can sometimes cut additional joints into existing slabs to relieve stress.
Keep Your Driveway in Top Shape With Sublime Pavers
Concrete cracks don’t have to mean expensive replacements. With the right materials, proper technique, and timely action, most driveway damage is completely repairable. Now you know how to identify what you’re dealing with, gather your supplies, and complete the repair the right way.
Key takeaways:
- Hairline and minor cracks under 1/4 inch are straightforward DIY repairs using flexible polyurethane filler
- Wider cracks require backer rod or sand to fill voids before applying caulk
- Always clean and dry the crack completely before filling to ensure proper bond
- Self leveling caulk works best for horizontal surfaces, while non-sag caulk handles edges and vertical repairs
- Cure time matters: keep foot traffic off for 24 hours and vehicle traffic off for 48 to 72 hours minimum
- Cracks wider than 1/2 inch or uneven slabs typically require professional assessment
- Regular sealing and drainage maintenance prevents future cracking
- Address small cracks immediately before they become expensive problems
If your driveway needs more than a weekend fix, Sublime Pavers offers concrete and paver repair services throughout Broward County. We’ll assess your situation honestly and recommend the most cost-effective solution, whether that’s targeted repairs or something more comprehensive. Call (954) 420-6683 for a free estimate.
FAQs
What is best to fill concrete driveway cracks?
The best way to fill driveway cracks depends on width. For cracks under 1/4 inch, use flexible polyurethane caulk designed for concrete. For wider gaps, insert backer rod first, then apply self-leveling filler. Avoid rigid materials like standard mortar, which will crack again as the slab moves with temperature changes.
Should I repair cracks in a concrete driveway?
Yes, absolutely. Even small cracks allow water infiltration that causes further damage over time. What starts as a hairline crack can become a major structural problem after a few freeze-thaw cycles. Addressing cracks early protects your investment and prevents costly repairs later. The same logic applies to your patio, walkways, and other concrete surfaces around your house.
Is it ok to put cement over cracked concrete?
It depends on the crack type. For surface-level crazing or minor damage, a concrete resurfacer can cover the area effectively. However, thick layers of new cement over structural cracks won’t solve underlying problems. The new layer will eventually crack in the same places. If cracks are deep or the slab is uneven, you need to address the root cause first.
What is the best product to repair cracks in a concrete driveway?
For most residential repairs, flexible polyurethane concrete caulk is the answer. It moves with the slab and won’t pull away like rigid fillers. For structural repairs or high-traffic areas, two-part epoxy provides a stronger bond. Avoid using wood filler, standard paint-on sealers, or masonry mortar as primary crack fillers. These products aren’t designed for the movement concrete experiences.
How much does it cost to repair a crack in a concrete driveway?
DIY repairs cost $20 to $80 in materials for most driveways. Professional crack filling runs $1 to $3 per linear foot plus a service call fee of $75 to $150. A 10-foot crack might cost $175 to $250 professionally. Major structural repairs or slab leveling can reach $500 to $1,500. Full replacement ranges from $3,000 to $8,000 depending on size. Related questions about patio repairs typically have similar pricing.


