

Are you tired of your paver patio looking like a rollercoaster ride? Uneven pavers can be a real eyesore, not to mention a tripping hazard. But fear not—we’re here to guide you through the art of leveling ground for pavers.
In this guide, we’ll cover everything you need to know to get that smooth, picture-perfect surface you’ve always dreamed of:
- Essential tools and materials for the job
- Step-by-step instructions on leveling the ground
- Troubleshooting tips for common mistakes
- How to prevent future unevenness
If you happen to be in South Florida and all this sounds like a hassle, why not leave it to the pros? Sublime Pavers has been wowing homeowners with stunning outdoor spaces for over 15 years. We’ll handle all the heavy lifting (literally) so you can kick back and enjoy your new patio.
Gear Up: The Right Tools for a Level Playing Field
Before you headfirst into leveling your stone pavers, let’s ensure you’ve got the right equipment on hand. No need to break the bank, but having the essentials will make your life a whole lot easier:
- Shovel and Rake: You’ll need these trusty tools to remove any existing sod or debris and to level out the base material.
- Tape Measure and Level: These are your best friends when it comes to precision. The measuring tape measure helps you calculate the right amount of materials, while the level ensures everything is, well, level.
- String Line and Stakes: These are essential for creating a guide to follow when leveling. The string line acts as your reference point, while the stakes hold it in place.
- Plate Compactor (Optional): If you’re dealing with a large area or loose soil, a plate compactor can help you achieve a more solid base. You can usually rent one from your local hardware store.
- Tamper: This handy tool helps you pack down the base material and create a smooth, even surface. A hand tamper is usually sufficient for smaller projects.
- Safety Gear: Don’t forget to protect yourself. Wear gloves to prevent blisters and safety glasses to shield your eyes from dust and debris.
Pro Tip: If you’re not sure which tools are right for your project, ask a knowledgeable staff member at your local hardware store for advice.
Let’s talk materials:
- Base Material: This is the foundation of your paver project. Depending on your soil type and the size of your patio, you might use crushed stone, gravel, or fine sand.
- Paver Base Panels (Optional): These panels provide additional stability and prevent your pavers from shifting over time.
- Paver Coarse Sand: This special type of bedding sand is used to fill in the joints between your pavers and lock them in place before you install pavers.
- Edge Restraints: These are essential for keeping your pavers from spreading apart. You can use plastic, metal, or concrete restraints.
Keep in mind, the quality of your materials can make or break your project. Don’t skimp on the good stuff. Investing in high-quality materials will ensure your pavers look great and last for years to come.
Level Ground for Pavers: Your Step-by-Step Playbook
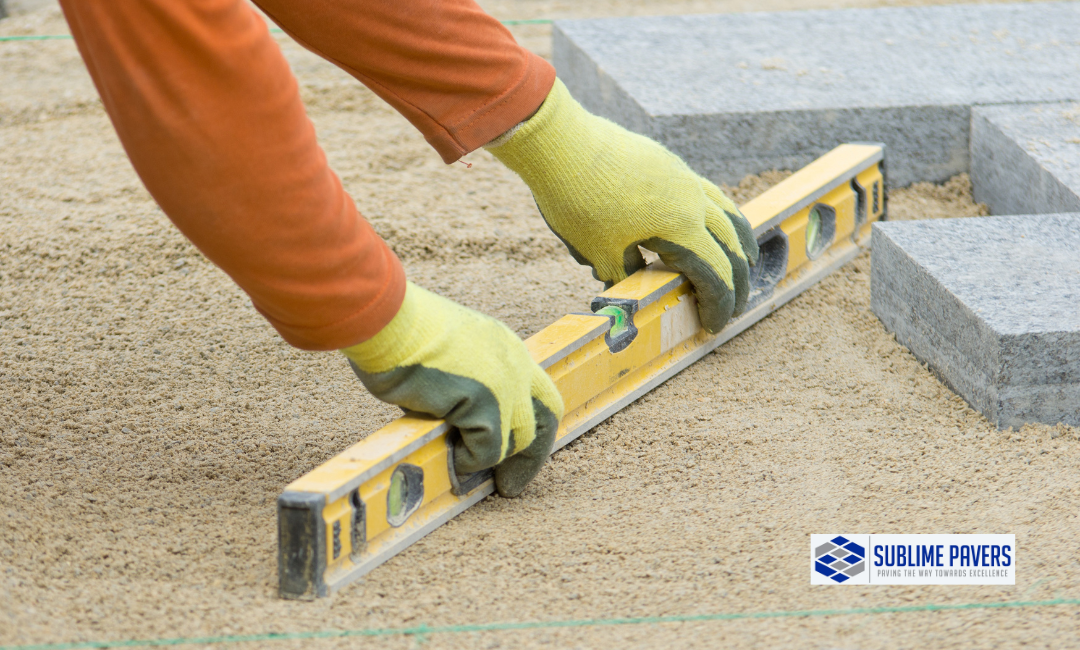
Alright, let’s get down to business. Follow these steps to transform your uneven surface into a smooth canvas for your pavers:
1. Clear the Way
- Remove Obstacles: Start by clearing the area of any grass, weeds, or debris that might interfere with the leveling process. Use a shovel to dig out stubborn patches of grass.
- Level the Ground: Once the area is clear, use a rake to level out any major bumps or dips in the ground. You want a relatively flat surface to start with.
2. Establish Your Base
- Choose the Right Material: The type of base material you choose will depend on factors like soil conditions, climate, and the weight of your pavers. Common options include crushed stone, gravel, or sand.
- Determine Base Depth: The depth of your base layer is crucial for providing adequate support. A general guideline is 4-6 inches, but you may need more or less depending on your specific situation.
- Even Distribution: Spread the base material evenly across the entire area, ensuring there are no large clumps or voids. Use a rake to distribute the material uniformly.
3. Set Your Sights
- Mark Your Boundaries: Use stakes and string lines to create a clear outline of your desired paver area. Make sure the lines are level and parallel to each other.
- Check for Slope: If your patio will be on a slope, adjust the string lines accordingly to create the desired incline. A slight slope is essential for proper drainage.
4. Fine-tune the Walking Surface
- Create a Level Plane: Use a rake to adjust the base material, adding or removing as needed to match the height of your string lines. Aim for a consistent level throughout the entire area.
- Address Inconsistent Areas: If you encounter particularly uneven spots, add or remove material to correct them. Take your time and ensure a smooth paver surface.
5. Compact and Check
- Solidify the Base: Use a hand tamper or plate compactor to compact the base material thoroughly. This will prevent settling and create a stable foundation for your pavers.
- Verify Levelness: After compacting, double-check the levelness of the base using a level. Make any necessary adjustments before proceeding to the next step.
Pro Tip: If you’re working on a slope, be sure to factor in the grade when setting your string line. You want your pavers to have a slight slope for proper drainage.
Don’t Let These Mistakes Trip You Up
Even with the best intentions, things can still go wrong. But fear not, we’ve got your back. Here are some common mistakes to avoid when leveling ground for pavers:
Skipping the Compaction Stage
This is a big no-no. Compacting your base material is crucial for creating a solid foundation that won’t shift or settle over time. If you skip this step, you’ll likely end up with uneven pavers and a whole lot of headaches down the road.
- Solution: Use a hand tamper or plate compactor to thoroughly compact the base material after leveling. This will ensure your pavers stay put for years to come.
Neglecting Proper Drainage
Ignoring drainage is a recipe for disaster. Pooling water can cause your pavers to shift, crack, and even become a breeding ground for mold and mildew.
- Solution: Make sure your patio has a slight slope (about 1/4 inch per foot) away from any structures. This will allow water to drain properly and keep your pavers in tip-top shape.
Using the Wrong Base Material
Not all base materials are created equal. Choosing the wrong one can lead to settling, shifting, and a host of other problems.
- Solution: Do your research and select a base material that’s appropriate for your climate, soil conditions, and the weight of your pavers. If you’re unsure, ask a professional for advice.
Cutting Corners on Base Depth
A shallow base is a weak base. Skimping on the depth of your base material can compromise the stability of your pavers and lead to costly repairs down the line.
- Solution: Aim for a base depth of 4-6 inches, or more if you’re dealing with heavy pavers or unstable soil. It’s better to be safe than sorry.
If you’re in South Florida, consider using Sublime Pavers’ expertise. We have the experience and know-how to ensure your base is properly prepared for long-lasting results. We take the guesswork out of choosing the right materials and depth, so you can relax and enjoy your outdoor oasis.
Future-Proof Your Patio: Prevent Unevenness Before It Starts

You’ve put in the hard work to level your ground for pavers. Now, let’s make sure it stays that way. Here are some tips to prevent future unevenness and keep your patio looking its best:
Mind the Gap:
- Proper spacing: Leave a consistent gap (usually 1/8 inch to 1/4 inch) between each paver. This allows for expansion and contraction due to temperature changes, preventing cracking and shifting.
- Fill joints with paver sand: Sweep polymeric sand into the joints to lock the pavers in place and create a stable surface.
Edging is Key:
- Install edge restraints: Use plastic, metal, or concrete edging to create a border around your pavers. This helps prevent them from spreading apart and keeps your patio looking neat and tidy.
- Secure the edges: Make sure your outer edge restraints are firmly anchored in place. This will prevent them from shifting and compromising the stability of your pavers.
Maintain Your Base:
- Regular inspections: Check your patio periodically for signs of settling or shifting. If you notice any unevenness, address it promptly before it becomes a bigger problem.
- Refill paver sand: Over time, joint sand can wash away or settle. Refill the joints as needed to maintain a level surface and prevent weed growth.
Beware of Tree Roots:
- Keep roots at bay: Tree roots can wreak havoc on pavers by lifting them up and creating unevenness. If you have trees near your patio, consider installing a root barrier to protect your investment.
Paver FAQs
What’s the easiest way to level ground for pavers?
For smaller areas, using a hand tamper and a long, straight board (like a 2×4) is a simple way to level the ground. For larger areas or if you want to make sure the ground is extra compacted, renting a plate compactor can be a lifesaver.
Can you lay pavers on uneven ground?
Technically, yes, but it’s a recipe for disaster. Uneven ground will lead to uneven pavers, which can be a major eyesore and even a tripping hazard. Plus, it’ll shorten the lifespan of your patio. It’s worth the effort to level the ground properly before laying any pavers.
How many inches of leveling sand do I need for pavers?
Typically, you’ll need about 1 inch of leveling sand on top of your compacted base material. This layer provides a smooth surface for laying your pavers and allows for minor adjustments.
How to level uneven ground by hand?
If you’re leveling a small area, you can do it by hand using a shovel, rake, and a long, straight board to screed the surface. However, for larger areas or areas with significant unevenness, using a plate compactor or hiring a professional is recommended.
Can you lay pavers directly on dirt?
Nope. Laying pavers directly on dirt is a surefire way to end up with a sinking, shifting mess. You need a proper base of compacted material to support the pavers and prevent them from moving.
How to level dirt by hand?
You can use a shovel and rake to remove excess dirt and fill in low spots. For a smoother finish, use a longboard to screed the surface. Remember to compact the dirt after leveling to prevent settling.
Is leveling sand needed for pavers?
Yes, leveling sand is essential for installing pavers. It provides a smooth, stable surface for laying your pavers and allows for minor adjustments during the process. It also helps lock the pavers in place and prevent them from shifting.
Wrapping Up: Level Ground, Sublime Pavers
You’re now armed with the knowledge and know-how to tackle your paver project like a pro. Remember, a level base is the foundation of a beautiful, long-lasting patio. So, take your time, follow the steps, and don’t be afraid to ask for help if you need it.
Your key takeaways:
- Gather your tools and materials before you start
- Clear the area and establish a solid base
- Use string lines and a level to create a smooth surface
- Compact the base to prevent settling
- Troubleshoot common mistakes and prevent future unevenness
And if you’re in the Fort Lauderdale area, why not let Sublime Pavers take care of the hard work for you? With our 15+ years of experience and commitment to quality, we’ll create an outdoor space you’ll love for years to come.


